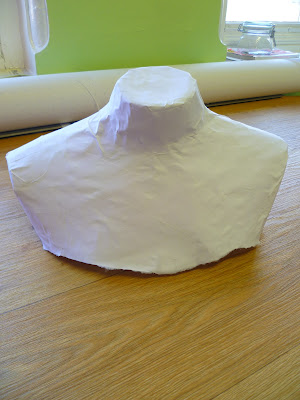
DIY Shoulder Displays
A couple of months ago I created some shoulder displays for a festival to showcase my collars, however I then saw many options for them, such as to put your jewellery on, cover them in different vintage papers or use them to display other items.
Here's a step-by-step guide using the ever so trusty papier-mache.
You will need:
- Lots of Paper ripped up into small shapes
- PVA Glue
- Cling Film
- A mannequin
- Paintbrushes
- Scissors
Start by covering the mannequin in cling film to protect it underneath and to help get the finish product off once its dried.
By mixing the PVA Glue with water to create a runny gloopy mixture, start by layering up small sections of paper over the body form. I did 3 layers in total but you can make make it as sturdy and thick as you like.
Leave to dry for around 24 hours to ensure it dries all through, putting it outdoors in warm sunshine can speed this up.
Once it's dried, you choose to put another layer of pure PVA over the top to create a glossy look and then leave that to completely dry, or you can paint it in any colour you wish.
Once that has done and completely dry, make a snip up the center back to create ease it getting the shoulders off. Cut the cling film just beneath the paper line and then gently pull the shoulders off. Once you have got it off, the cling film should just peal straight off from inside.
Once finished, you choose to either level off the bottom edge or leave it rough, I chose to leave it rough.
Follow Hannah Elizabeth on Facebook


No comments:
Post a Comment